Project: Ballet Baby Blanket
06/28/2006
I currently work with a husband and wife at my small company, and they are expecting a baby girl in just a few short weeks. In keeping with my tradition, I decided to make a baby blanket for the new arrival.
BACKGROUND
Although I prefer art quilting and non-traditional techniques, there is a part of me that loves traditional patterns. I love studying the history of quilts and am always amazed at the accuracy of the piecing and quilting. Every now and then I get the itch to try out something I find, and a baby blanket gives me the perfect opportunity to do so - big enough to try it out and small enough to not turn into a nightmare!
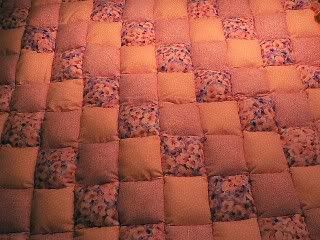
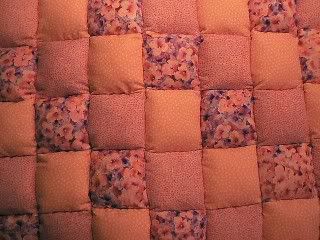
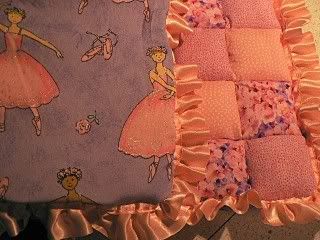
In one of the quilting forums I belong to someone posted about the pillow quilts. You remember those, don't you? Typically they are done in bright, funky colors, but I thought it would be a nice twist to try the technique in pinks and purples. I found a cute ballerina fabric for the back and it just went from there.
TECHNIQUES
There are two ways to do a pillow quilt. I chose the easiest! (The more traditional method is to do some strange folding & pinning and since I hate to pin anything . . . . . LOL!) Basically, I cut the squares for the quilt top (5 inches - 1 inch larger than the finished size) and cut squares of muslin (also 1 inch). I had a total of 120 fabric squares and 120 muslin squares.
I sewed the squares to the muslin (right sides together) leaving an opening for turning. I clipped the corners, turned and pressed. Next I stuffed the squares with a very soft batting. My son was a real help here since he has smaller fingers. The trick is to get enough batting in there to make a pillow but not too much that you end up having a hard time getting two pillows in the sewing machine.
After all squares were stuffed, I joined them, alternating the three colors. Once the top was finished, I attached the pre-made ruffle. Finally, I attached the ballerina fabric to the back.
posted by Caré @ 6:39 AM
![]()

0 Comments:
Post a Comment
<< Home